Bus Simulator Ultimate PC Keyboard Mapping and Practical Setup
Playing Bus Simulator Ultimate on a Windows PC feels different from playing it on a phone. The mobile version uses touch-based controls, including buttons, tilt, and a steering wheel. A keyboard gives you quick access to driving functions. You can assign keys for steering, acceleration, braking, lights, doors, and other controls. Your emulator or PC setup handles these keyboard inputs. The exact setup can vary between platforms. BlueStacks, LDPlayer, MEmu, and other tools may use different keymapping systems. Bus Simulator : Ultimate also now lists Windows among its supported platforms.
This guide focuses on practical Bus Simulator Ultimate PC controls. You will learn how to build a useful keyboard layout and map each key. We will also cover steering, mouse use, and common control problems One point matters before you start. Emulator mappings are custom or recommended layouts. Do not treat them as universal official PC key bindings.
How PC Keyboard Controls Work in Bus Simulator Ultimate
Bus Simulator Ultimate was built for mobile devices, so its original controls rely on touch input. Players can steer, accelerate, brake, and use bus functions through on-screen controls. On a Windows PC, the control method depends on your setup. An Android emulator can run the mobile game and connect keyboard input to its touch controls. Tools such as BlueStacks and LDPlayer provide keymapping features for this purpose.
Key mapping links a keyboard key to a specific on-screen control. For example, you can assign W to acceleration and A/D to steering. Pressing those keys then activates the mapped controls. Your emulator may use a different keymapping interface or default layout. Some setups may also have no useful keyboard mapping until you create one yourself. This means you should treat common keyboard layouts as recommended setups, not universal official defaults.
Touch Controls vs Keyboard Controls
| Mobile Control | PC Keyboard Mapping |
| Touch steering | W/A/S/D or Arrow keys |
| Touch accelerator | W / Up Arrow |
| Touch brake | S / Down Arrow |
| On-screen buttons | Assigned keyboard keys |
The goal is simple: map the controls you use most often to keys that feel natural while driving. This makes the PC setup easier to learn and adjust.
Recommended Bus Simulator Ultimate Keyboard Layout
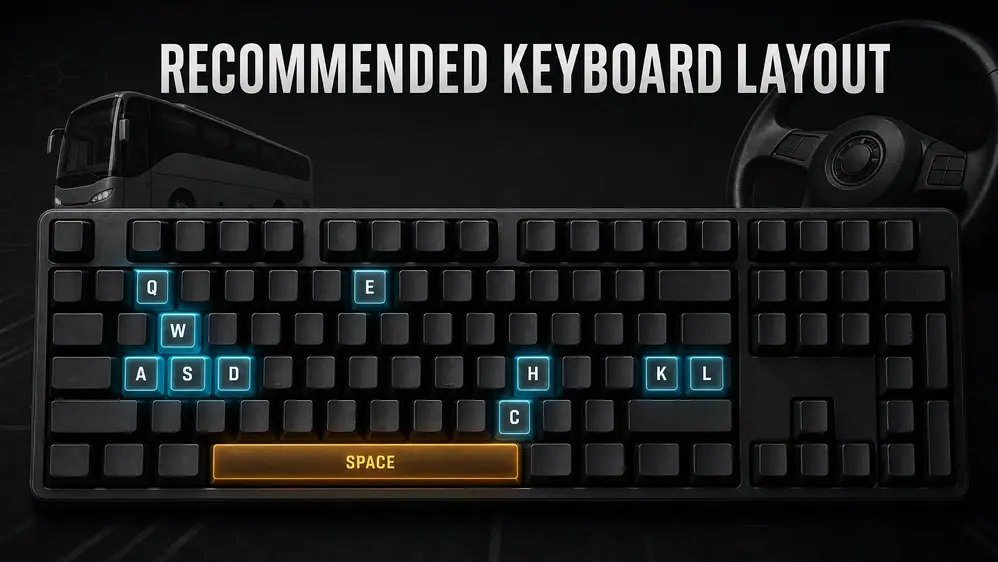
A good keyboard layout keeps your main driving controls close together. This reduces hand movement and makes repeated actions easier. These mappings work as a practical starting point for PC players. Your emulator may use different default keys or require manual keymapping. BlueStacks, for example, lets users create and edit custom controls through its Controls Editor.
Basic Driving Keys
Start with WASD if you want a familiar PC control scheme.
WASD keeps steering and throttle controls together. Arrow keys offer another option for players who prefer a separate control cluster. For reverse and gear functions, check the available controls inside your emulator. The exact action can change with your custom layout.
Bus Functions and Shortcuts
Place frequently used bus functions near your main driving keys. This helps you react without moving your hand across the keyboard. Use H for the horn and C for camera changes. You can assign L to headlights and K to wipers. Indicators can use Q/E, while O can handle doors. Use Esc for pause because it matches a familiar PC shortcut.
Engine and gear controls should stay close enough for quick access during stops or departures. The exact assignments depend on your emulator and the controls visible in the game. BlueStacks supports custom key controls, including tap spots and other input types.
Quick Keyboard Reference
| Action | Suggested Key |
| Accelerate | W / ↑ |
| Brake | S / ↓ |
| Steer Left | A / ← |
| Steer Right | D / → |
| Handbrake | Space |
| Horn | H |
| Camera | C |
| Lights | L |
| Wipers | K |
| Pause | Esc |
This table shows a recommended mapping, not an official universal PC control scheme. Your emulator can use another layout. Before starting a long route, test every key in a safe area. If a control feels awkward, change its mapping and save the new profile.
How to Set Up Keyboard Mapping on PC
Setting up keyboard controls starts with your emulator’s keymapping tool. The exact menu name can differ between emulators. The basic process remains similar.
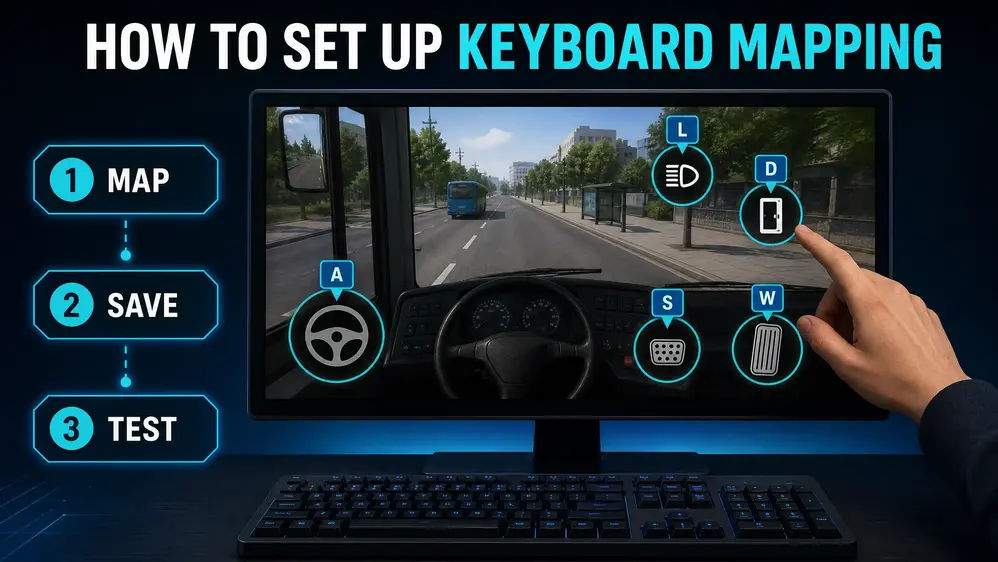
Step 1 — Open the Emulator’s Key Mapping Tool
Start your Android emulator and open Bus Simulator Ultimate. Wait until the driving screen shows the game’s touch controls. Next, open the emulator’s keymapping or key editor tool. BlueStacks calls its tool the Controls Editor, while other emulators may use different names. Place a keyboard control over each touch button you want to use. Then assign a key to that control. Start with driving actions before adding secondary functions.
Step 2 — Map Steering and Driving Controls
Map the main driving controls first. These controls affect almost every part of a route. Use A and D for left and right steering. Assign W to acceleration and S to braking. You can also use the arrow keys if they feel more comfortable. Keep the steering and throttle keys close together. This makes quick corrections easier during turns. Assign the Spacebar to the handbrake if your control setup supports it. Place reverse or gear controls near the main driving keys.
This reduces unnecessary hand movement. Test each control after assigning it. Hold the steering key briefly and check how the bus responds. Then test acceleration and braking separately.
Step 3 — Map Secondary Controls
Add the controls you use during normal driving. You can assign H to the horn, L to headlights, and K to wipers. Use nearby keys for indicators and doors. Assign C to camera changes if the game exposes that function. Avoid assigning too many actions to keys that sit beside each other. Accidental presses can become annoying during a route.
Step 4 — Save and Test the Layout
Save your custom control profile after completing the mapping. Then test every important key before starting a long trip. Check steering, acceleration, braking, reverse, lights, doors, camera, and other frequent actions. If one key feels awkward, change it immediately. A short test drive can reveal problems that the key editor cannot. It also helps you confirm that every keyboard shortcut triggers the correct touch control.
Best Keyboard Setup for Smooth Bus Driving
A good keyboard layout should feel natural after a few minutes of driving. You should reach common controls without moving your hand too far. The best setup depends on your preference and emulator. Still, WASD offers a strong starting point for most PC players.
WASD vs Arrow Keys
WASD works well because your main driving controls stay together. W handles acceleration, while A and D handle steering. S handles braking.This layout also leaves nearby keys available for other actions. You can place the horn, lights, camera, doors, and indicators around the same area. WASD also feels familiar to players who regularly use PC games. Arrow keys offer another practical option.
Up and Down handle acceleration and braking, while Left and Right handle steering. Some players prefer this layout because the steering keys sit farther from other controls. Arrow keys work especially well if you want your right hand dedicated to driving. You can then use your left hand for secondary shortcuts. For most players, I recommend WASD as the starting layout. Switch to arrow keys if they give you better control.
Keep Frequently Used Controls Close
Group your most-used controls around your main driving keys. Keep WASD together for driving. Put the horn, lights, indicators, and camera within easy reach. Keep the Spacebar for the handbrake because it is large and easy to press.Place doors, wipers, and other less-used actions farther away. This prevents accidental inputs during normal driving. Test the layout on a short route before using it for a long trip. Move any uncomfortable key until the setup feels natural.
Keyboard and Mouse Setup
A keyboard and mouse can make Bus Simulator Ultimate easier to control on a Windows PC. You do not need to map every touch button to a keyboard key.
What the Keyboard Should Handle
Use the keyboard for actions you perform often during a route.Assign keys for acceleration, braking, and steering first. These controls need quick and consistent access.You can also assign shortcuts for headlights, horn, doors, indicators, and camera changes. Keep these keys near your main driving controls when possible. This setup lets you keep both hands ready for driving. It also reduces the need to search for small on-screen buttons.
What the Mouse Should Handle
Use the mouse for actions that work better with direct screen input. This can include menus, touch-style controls, and camera interaction. The mouse also helps with controls that you rarely use. You can click those buttons instead of assigning another keyboard shortcut. This approach keeps your keyboard layout simple. You only map actions that need quick access during driving. A keyboard and mouse setup also works well when your emulator shows several touch controls. Map the important driving actions and leave the rest available for mouse input. The result is a cleaner control layout with fewer unnecessary shortcuts. You can also change individual mappings later without rebuilding the entire setup.
Setting Up Bus Simulator Ultimate Controls in Popular Emulators
Different Android emulators use different keymapping tools. However, the setup follows the same basic process.
Find touch controls → assign keyboard keys → save → test.
BlueStacks Keyboard Mapping
Open Bus Simulator Ultimate in BlueStacks. Then open the Advanced Keymapping or Controls Editor tool. Add controls over the game’s touch buttons. Assign keys for steering, acceleration, braking, and other actions. Keep frequently used controls near your main WASD layout. After assigning the keys, save the control scheme. BlueStacks supports custom control creation and editing through its Controls Editor.
LDPlayer Keyboard Mapping
Launch the game and open LDPlayer’s Keyboard Mapping tool. Select the touch controls you want to use with your keyboard.Place the required controls over the correct on-screen buttons. Assign keys based on your preferred layout. Save the mapping and test it inside the game. Check steering, throttle, brake, and secondary controls before starting a long route.
MEmu Keyboard Controls
Open Bus Simulator Ultimate through MEmu. Find the emulator’s key mapping or keyboard control editor. Assign keyboard inputs to the visible touch controls. Start with the main driving actions, then add lights, horn, camera, doors, and other useful shortcuts. Save the layout and test every important key. Move any control that feels difficult to reach. Bus Simulator Ultimate Global Offices
GameLoop and Other Emulators
Other emulators may use different names or editor layouts. The core process remains almost identical. First, display the game’s touch controls. Next, place keyboard mappings over the required buttons. Assign keys, save the profile, and test each action. Do not assume one emulator’s key layout will work the same way elsewhere. Always check the available controls and adjust the mapping to match your setup.
How to Adjust Steering Sensitivity
Keyboard steering can feel sharper than touch or analog controls. A keyboard sends a simple key press instead of a gradual steering movement. When you hold A or D, the bus may turn more than expected. This can make small corrections harder, especially during tighter turns.
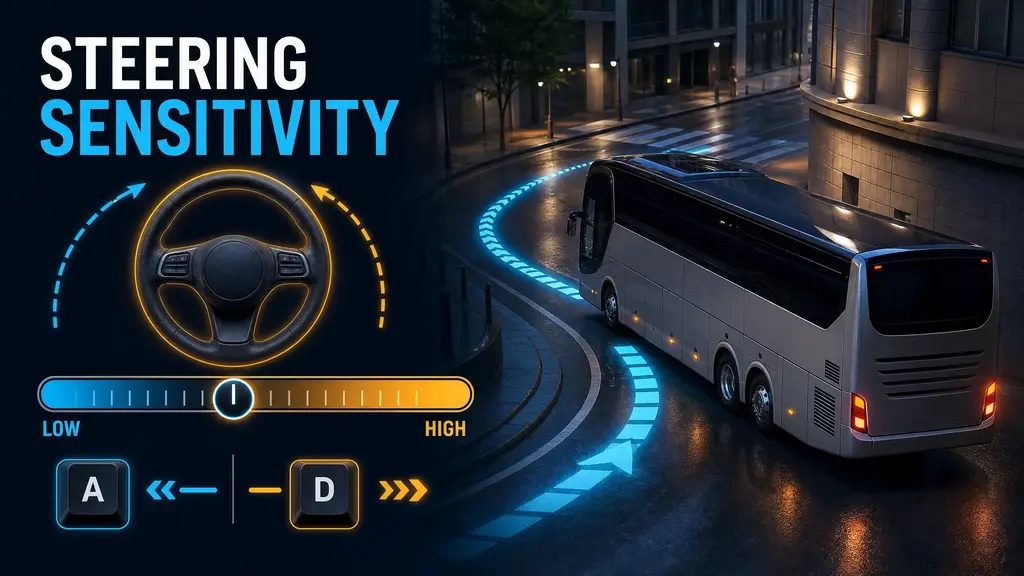
Steering Sensitivity
Check the game’s control settings or your emulator’s input options for sensitivity controls. If your setup provides a sensitivity slider, start near the middle. Test the steering after each small adjustment. Lower sensitivity can make steering feel easier to control. Higher sensitivity can make responses faster but harder to manage. Your emulator may also provide input settings that affect how keyboard presses interact with mapped controls. The available options depend on the emulator and control method.
Use Short Key Presses
Avoid holding the steering key longer than necessary. Tap A or D for small corrections. Use longer presses only when you need a larger steering change. This gives you better control with digital keyboard input. Test your setup on a short route before changing several settings together. Change one setting at a time, then compare the result. This approach helps you find a comfortable keyboard response without losing track of which setting caused the change.
Fix Bus Simulator Ultimate Keyboard Controls Not Working on PC
Keyboard problems can appear after changing a keymap, switching emulators, or updating the game. Most issues come from the mapping setup rather than the keyboard itself.
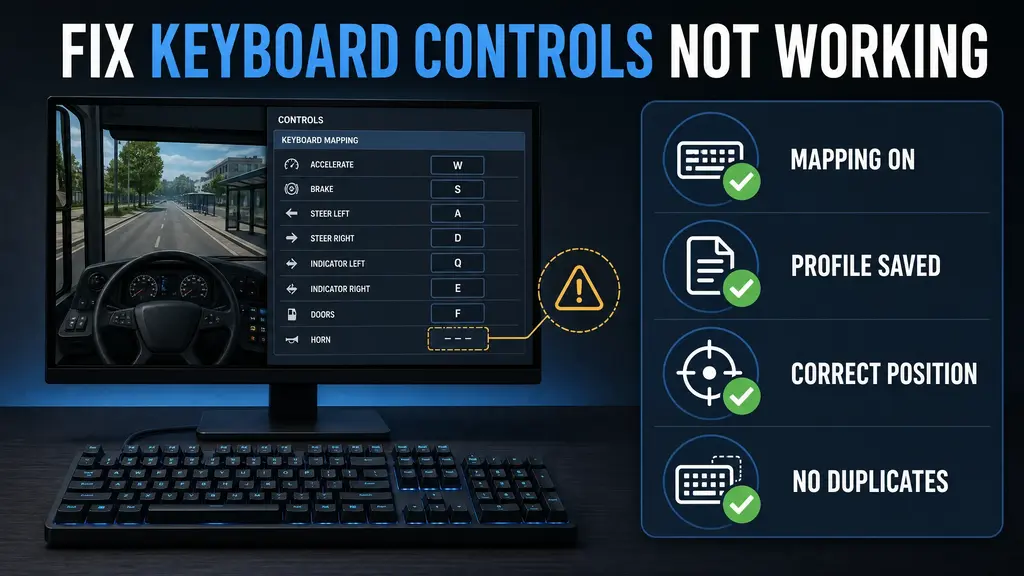
Keyboard Keys Do Nothing
First, check whether the emulator’s keymapping tool is active. Open the key editor and confirm that your assigned controls still exist. Test the keyboard outside the game. If the keyboard works elsewhere, check the emulator’s input settings. Also make sure you saved the control profile. Some emulators can lose unsaved mappings after closing the editor.
Steering Works but Other Buttons Don’t
Check the position of each mapped control on the game screen. A key must connect with the correct touch button. Then check the assigned key. Make sure another control does not use the same key. If you use multiple emulator profiles, confirm that the correct profile is active.
Keys Perform the Wrong Action
Open the key editor and inspect the affected controls. Look for duplicate assignments or controls placed over the wrong touch buttons. This layout works as a recommended starting point, not an official universal PC control scheme. Your emulator may use different defaults or control options. Start with this layout and test each key during a short drive. Move any uncomfortable key to a position that feels easier. Then save your personal control profile. Keep the driving keys together whenever possible. This makes quick steering, braking, and acceleration easier during normal play.
Controls Stop Working After an Update
Game or emulator updates can change the way mapped controls behave. An update may also change the position or availability of an on-screen control. Open the keymapping editor after an update. Check your main driving keys first. Then test secondary controls such as lights, doors, horn, and camera. If a mapping no longer works, remove it and create it again. Save the profile and test the controls before starting a long route.
A Practical Keyboard Layout to Start With
If you are unsure where to begin, use this simple keyboard layout. It keeps the main driving controls together and places common bus functions nearby.
| Function | Key |
| Accelerate | W |
| Brake | S |
| Steer Left | A |
| Steer Right | D |
| Handbrake | Space |
| Horn | H |
| Camera | C |
| Lights | L |
| Wipers | K |
| Door | E |
| Indicator | Q / another available key |
| Pause | Esc |
This layout works as a recommended starting point, not an official universal PC control scheme. Your emulator may use different defaults or control options. Start with this layout and test each key during a short drive. Move any uncomfortable key to a position that feels easier. Then save your personal control profile. Keep the driving keys together whenever possible. This makes quick steering, braking, and acceleration easier during normal play.
Frequently Asked Questions
What are the best keyboard controls for Bus Simulator Ultimate on PC?
WASD offers a simple starting point for PC driving. Use W for acceleration, S for braking, and A/D for steering. Keep keys like H, C, L, and E nearby for common bus functions.
Can I play Bus Simulator Ultimate with a keyboard?
Yes. You can use an Android emulator with custom keymapping. The emulator connects keyboard keys to the game’s touch controls.
Does Bus Simulator Ultimate have official PC keyboard controls?
The game’s original controls focus on mobile touch input. Emulator key layouts can differ between platforms. Treat custom keyboard mappings as recommended setups unless the game or platform confirms a specific default.
Can I use WASD to drive the bus?
Yes. You can assign W, A, S, and D to the relevant touch controls through your emulator’s keymapping tool. This creates a familiar PC control scheme.
Can I use a keyboard and mouse together?
Yes. Use the keyboard for driving and frequent shortcuts. Use the mouse for menus, touch-style controls, and actions that do not need dedicated keys.
Why are my keyboard controls not working?
Check three things first. Make sure keymapping is enabled, confirm your saved control profile, and verify that each key points to the correct touch control. Also check for duplicate key assignments.
Conclusion
Setting up Bus Simulator Ultimate keyboard controls on PC does not need to be complicated. A simple mapping can give you better control during every route.
Follow these steps:
Start with the recommended WASD layout and adjust it to your preference. Test your changes before starting a long route. A good setup should keep important controls easy to reach. Once your mapping feels comfortable, save the profile for future sessions.